This pattern promises big blocks that work up quickly and several techniques to keep you engaged as you work, like four at a time flying geese and flip and stitch methods! Best for confident beginners to intermediate quilters, this pattern will show you how to make a baby size, throw, or twin size quilt.
I figured it’s about time I made a blog post with the resources I’ve gathered over the past two and half years. While I figure this is a very niche subject, the people that will want this will probably be very glad I did put this out there. I know I would have been grateful for it when I started this journey!
In this post, I will include traditional as well as substitutional items as well I could find. If you desperately wanted to hand sew your kimono the traditional way, I found the resources for that (and maybe went a little crazy and bought them). If you just want a traditional kimono that you can wear, and don’t mind that it was made with help from a sewing machine and supplies from your country, I’ll have resources for that, too.
I will also include resources to patterns, suppliers, and teachers that I’ve used consistently throughout these processes. I may not know the answers, but knowing where to find the answers is also a skill I’ve learned to value over the years, and being able to point you in the direction of the answers (even if I don’t know the answer myself) is something I have you appreciate and get a lot of use out of.
Why am I qualified? Well, it hardly seems like it, but by this point in my nearly three years of wasai (和裁 – Japanese sewing, as opposed to “yosai” or Western sewing) I’ve made seven kimonos for myself, one for my husband, three haori, four pairs of tabi socks to varying degrees of success, one Nagoya obi, two hanhaba obi, handfuls of emmonuki, oodles of hime, two pairs of mompe, a male haori, my own hakama, two sets of juban, more than a dozen furoshiki, my own kaishi ire (懐紙入れ), a sukiyabukuro (数寄屋袋), and a kobukusa (古帛紗) (three items for tea ceremony). Have I done all of them well? No. There’s a reason I’ve made so many kimono for myself. It takes a while before you really get a feel for the tailoring process, I’ve discovered. It’s simple . . . and also not. But I digress. I’ve been doing this a while. And while I may not be the best tailor, I am really good at documenting where I buy things. Which is really the point of this post! 😀 And since I’ve been doing this a while (and for a lot of things) YOU (and my ADHD brain) get to reap the benefit of having it logged somewhere that isn’t as easily misplaced as my sewing notebook.
Let’s start with the tools you’ll need. If you plan on using a machine (which is totally FINE BY THE WAY YOU CAN MAKE A TRADITIONAL KIMONO WITH ONE OK) you’ll need – a machine. I’ll include a few I’ve gotten my hands on and enjoyed that will carry you through, including two of mine that have lasted for years. I also recommend looking at yard sales and qualified secondhand retailers. A well maintained sewing machine or serger can have many years left at a discount.
Universal Tools (Things you’ll need whether you’re doing traditionally or not): Sewing clips Sewing pins Fabric chalk or marking pens Fabric scissors (specifically angled for tabletop or floor cutting) Kneeling pad (if you have hard floors – TRUST ME) Extra long tape measure Fabric weights (optional but handy in a lot of cases when you’re not working with cotton) Kimono hanger A good iron (I purchased this one because it allowed me to make marks with the point like traditional Japanese irons which I can’t get my hands on – yet! It also heats quickly, evenly and is a great size for doing seams.) NOTEBOOK – You’ll want a notebook that makes it easy to take measurements and draw diagrams. I like dot grids. You’ll also want something that lays FLAT so you can see your pages while your hands are busy. I think I could do a whole post on note books and accessories! Erasable gel pens – please trust
Sewing Machines: Singer C5200 – large plate is handy for the amount of fabric kimono requires Bernette B37 (one of my favorite personal machines – excellent review here)
Resources
Kitsuke: My personal sensei, friend and all around nice human, Billy Matsunaga. Her Patreon and Instagram are also great resources. Her video below is how I learned how to start sewing kimono!
As above, KimonoYukiko is a great resource for wasai items.
MKimono is also a great resource, though they are often out of stock. Put in a request for items to be restocked to be notified. You might wait a while, but if you really want something traditional, it can be worth the wait. It’s how I got several of my items direct from Japan.
Now, assuming you have the basic supplies, you first have to determine your measurements before you decide on fabric. Thankfully, my teacher, Billy Matsunaga, has a whole video dedicated to finding your kimono measurements. This will help you if you want to find secondhand kimono, new kimono, or in our case, sew your own!
Have someone help you measure if you can. Once you have your measurements done TWICE and you’ve verified that they match, you can be sure you have the correct measurements. Congratulations! You now have your kimono size! This is a true accomplishment. Now you have the information you need to start in the first video to make your own kimono. Grab a cup of tea, sit down with your notebook and erasable pens and give the first video at least two watches. Pause it. Rewind it. Ask questions until you get the answers you need – they’re in there!
I have a task list with timestamps associated with that video on making a kimono. I haven’t typed it up yet, and that would make for an entirely other post, but I think it would be helpful to some people? If this would be helpful to you, for example, collar begins at 20:22, and hems are here, etc, would you comment and let me know? I’ve hand written it out for now, but if it would be helpful, I’d hot link it for you. 🙂
FABRIC SHOPPING~!!!
Well, almost.
Yes, you get to go shopping for your first fabric! But PLEASE don’t go buying your dream fabric for your first kimono. Or you will have nightmares. Instead, go to your local thrift store and buy a bedsheet or two. I’m not kidding. I did this for my first juban (undergarment) and kimono. And I’m very glad I took Billy’s advice. I learned a lot and made a lot of mistakes for very little monetary investment.
Once you get to a point where you’re ready to invest, here are a few places I shop. I almost never buy fabric on Amazon. I have rarely heard good things.
Fabric Mart Fabrics – My blue kimono fabric is from here! JoAnn’s – oh dear I spend way too much here Mood Fabrics – designer fabrics Etsy – I have had many successes here from many different sellers!
Let’s talk FIBER. My first juban was from some old polyester (yes, POLYESTER) bedsheets I found at Goodwill with FLAMINGOS on them. It is amazing. Possibly poly-cotton because of how it sticks to cotton, but it is definitely poly because of how it smells when ironed. My second haori I thought to work with was 100% polyester, and I was not ready for that slippery challenge as a new seamstress. From then on, I worked with cotton for my next several kimono, and it was perfect for me to learn on. If you’re starting out, definitely try cotton. It’s cheaper, for starters, and way more forgiving. It’s easier to iron and tell it what to do than other fibers. It’s easily washed and cared for, and it comes in so many fun prints and colors! Until you’re confident you’ve discovered the measurements and skill of making a kimono that fits you, I highly recommend sticking to cotton.
Just Try
You’ve got your supplies, measurements, and fabric – now all you have to do is work up the gumption to start. To be honest, I sat on some fabric for over a year – a YEAR before I told myself to try. I admittedly still have a serger sitting in my craft room that I haven’t touched because it intimidates me. But this is the year I fix that.
Here are some playlists I like to listen to while I work that may ease you into the kimono making mood.
I’ll be updating this post as I find more resources that I think will aid you – and I’ll let you know if I ever figure out that serger. 😉 Until then, happy kimono making!
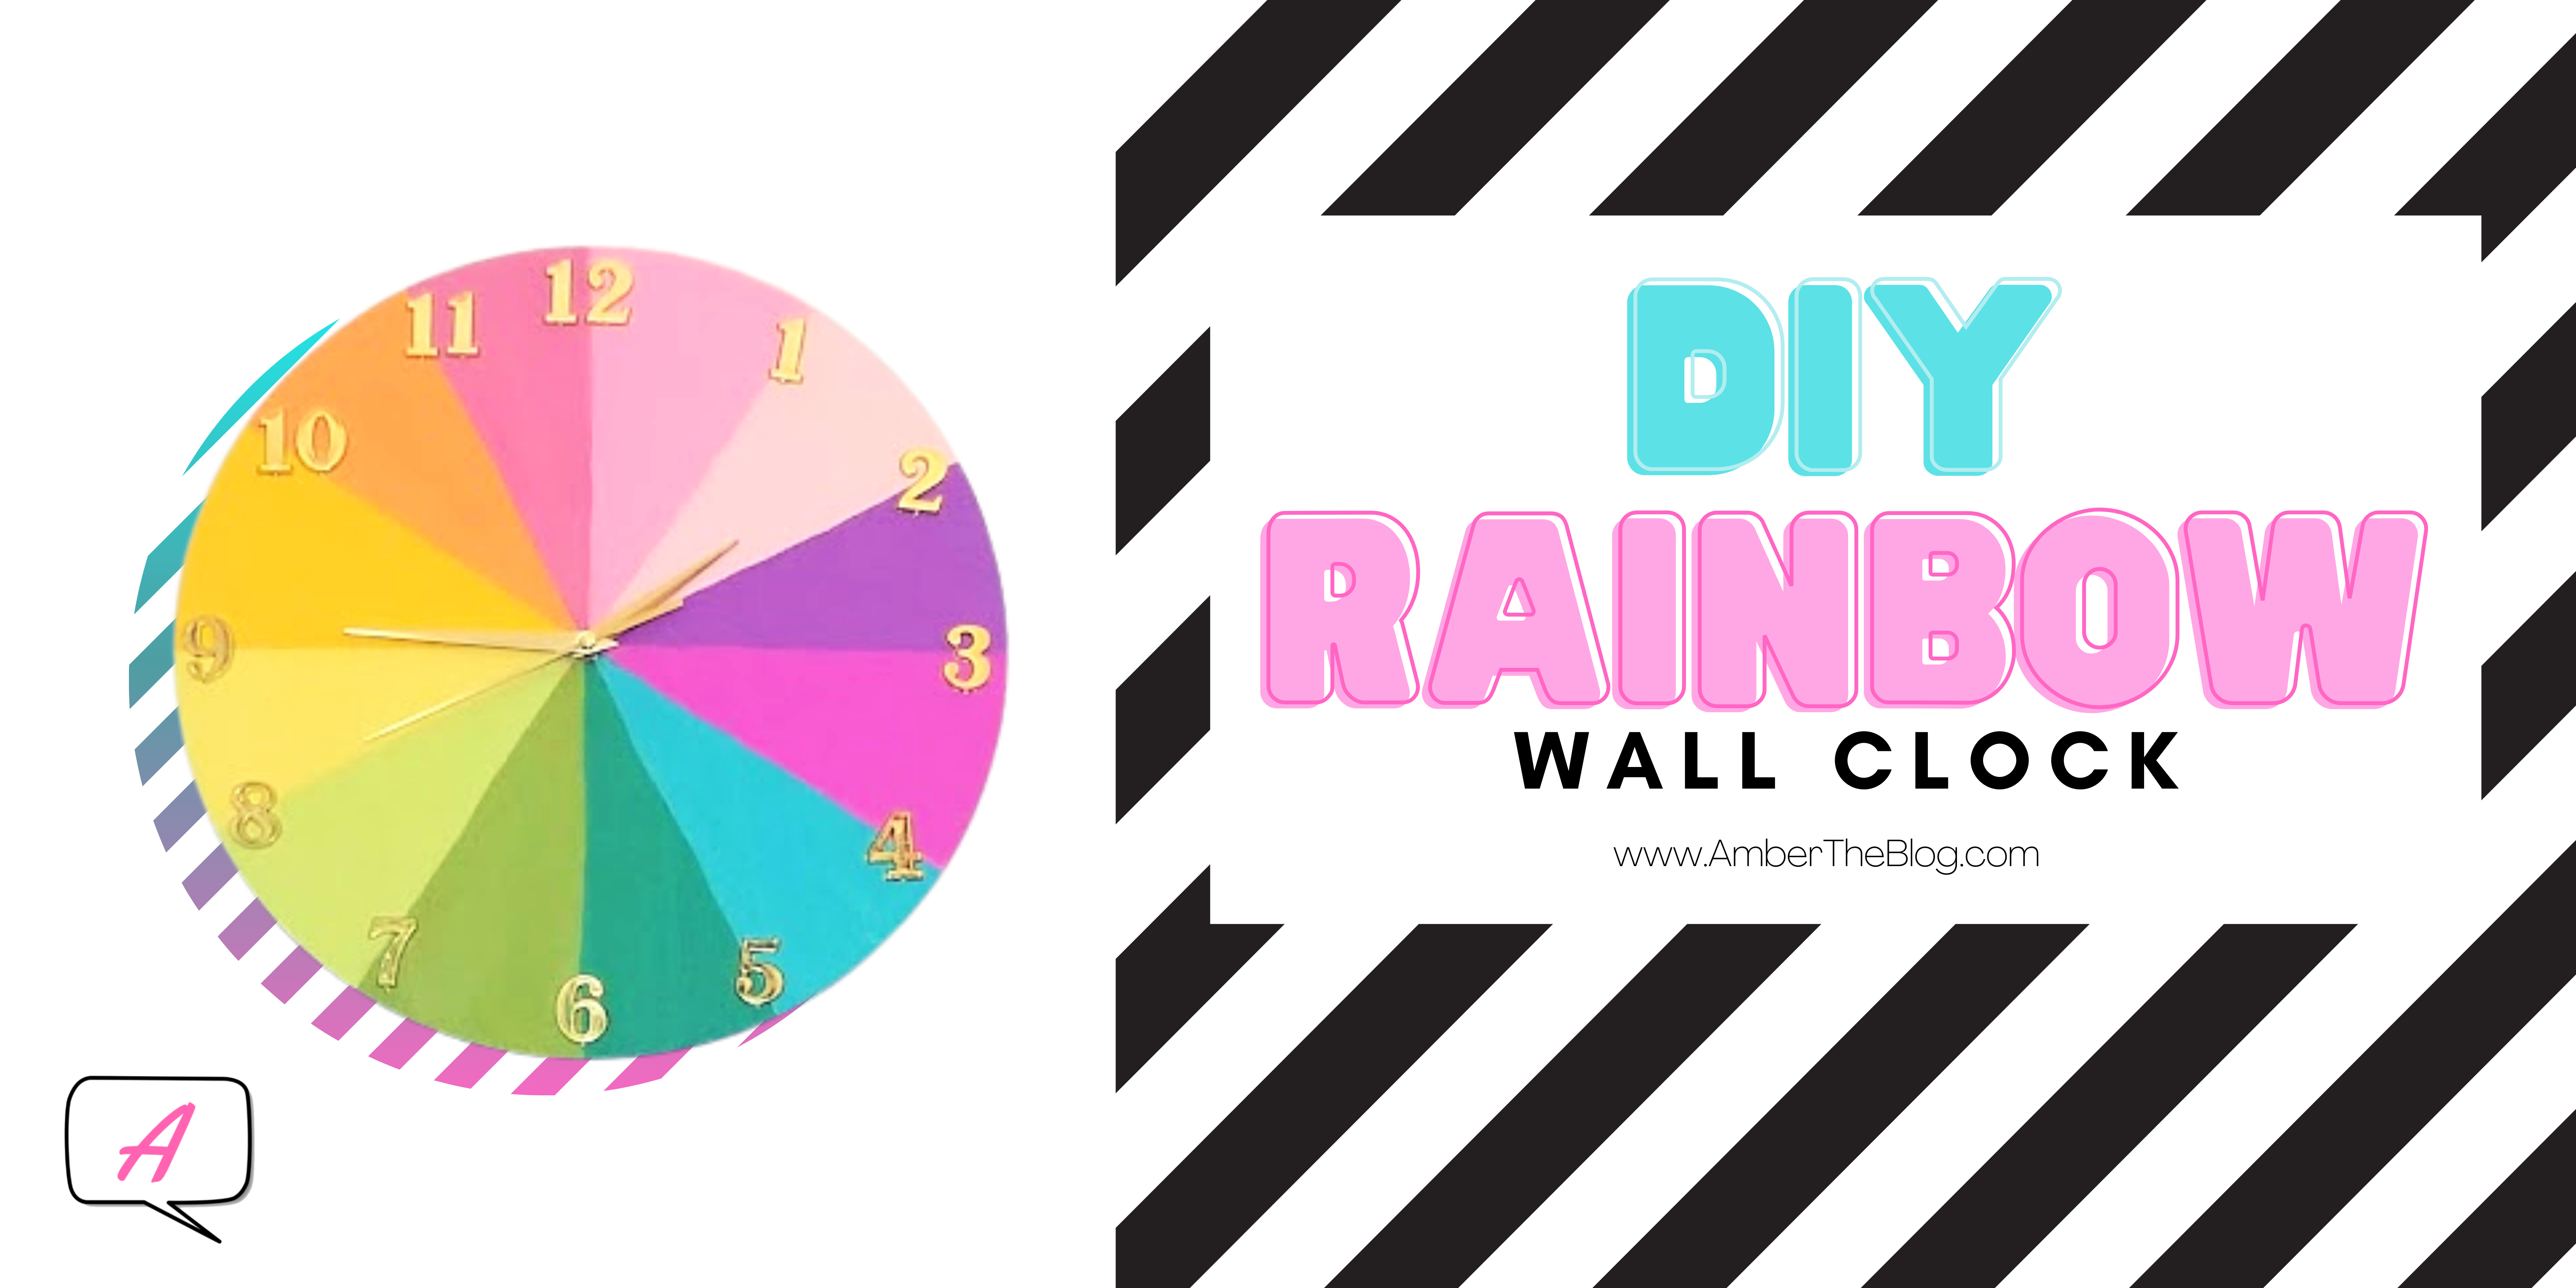
If you’ve been around for a while, it should be no surprise that I love things bright and colorful. And I was having the HARDEST time finding a clock for my office/craft room that went with my vibrant vibe! So you know what that means – DIY TIME!!!
First off, I was totally inspired by Kailo Chic’s version of this rainbow, color wheel sort of clock. I wanted to make it my own way, so of course I changed it up a bit. And if you want to make your own as well, I have a list of everything I used, where I bought it, and alternatives in case you’re not close to a brick and mortar store. And don’t worry! Everything is easy to get, easy to use, and totally fun! (Plus, the outcome is stinking adorable.)
This post will have amazon affiliate links. It doesn’t affect your prices.
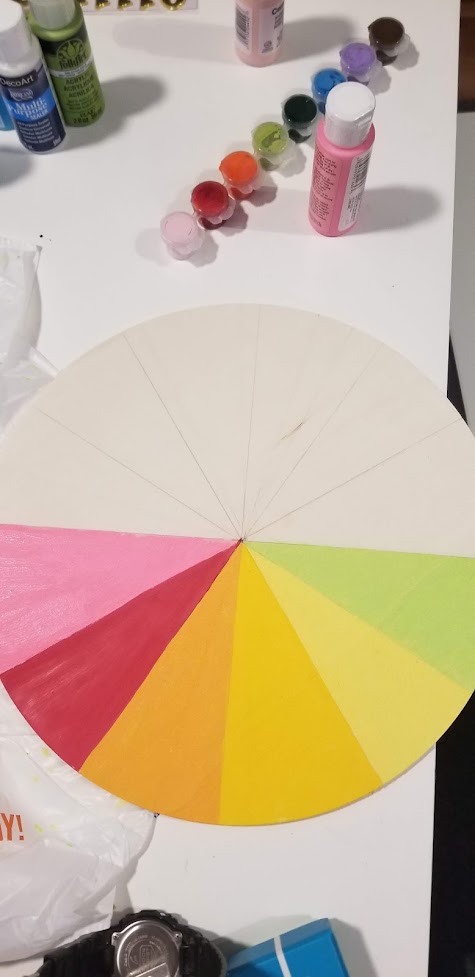
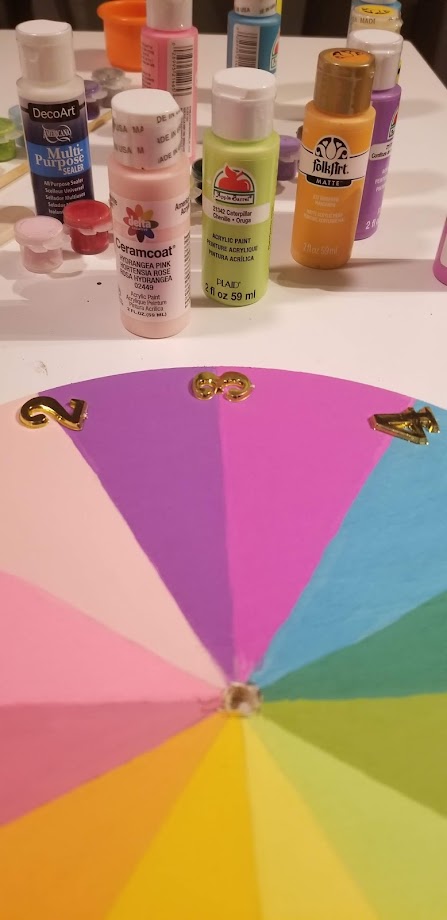
By far the most difficult part for me was eyeballing the division into twelfths. (Also, that’s a weird word to spell. “Twelfths.” Sort of weird to say, too, now that I’ve tried.) This is where you can optionally use a protractor to help you out.
Now, I didn’t use a protractor. I eyeballed it first into half, then half again to give me quarters. Then I carefully eyeballed each quarter into thirds to give me 12 equal-ish sections, one for each hour. (There was a substantial amount of erasing involved.)
If you use a protractor, my math tells me that each section should be 30 degrees wide. (There are 360 degrees in a circle. Three-hundred-sixty divided by 12 = 30.) If that’s wrong, well, oops. But if you want them to be EXACT, use a protractor. If you want to discover new colorful expletives that aren’t curses that you can growl in front of your child, just eyeball it. (“FUDGE RIPPLE. COW PATTIES. CHICKEN NUGGETS” are a few of my favorites. Try it. Just say one with all the force of a curse word. Feel better, right?)
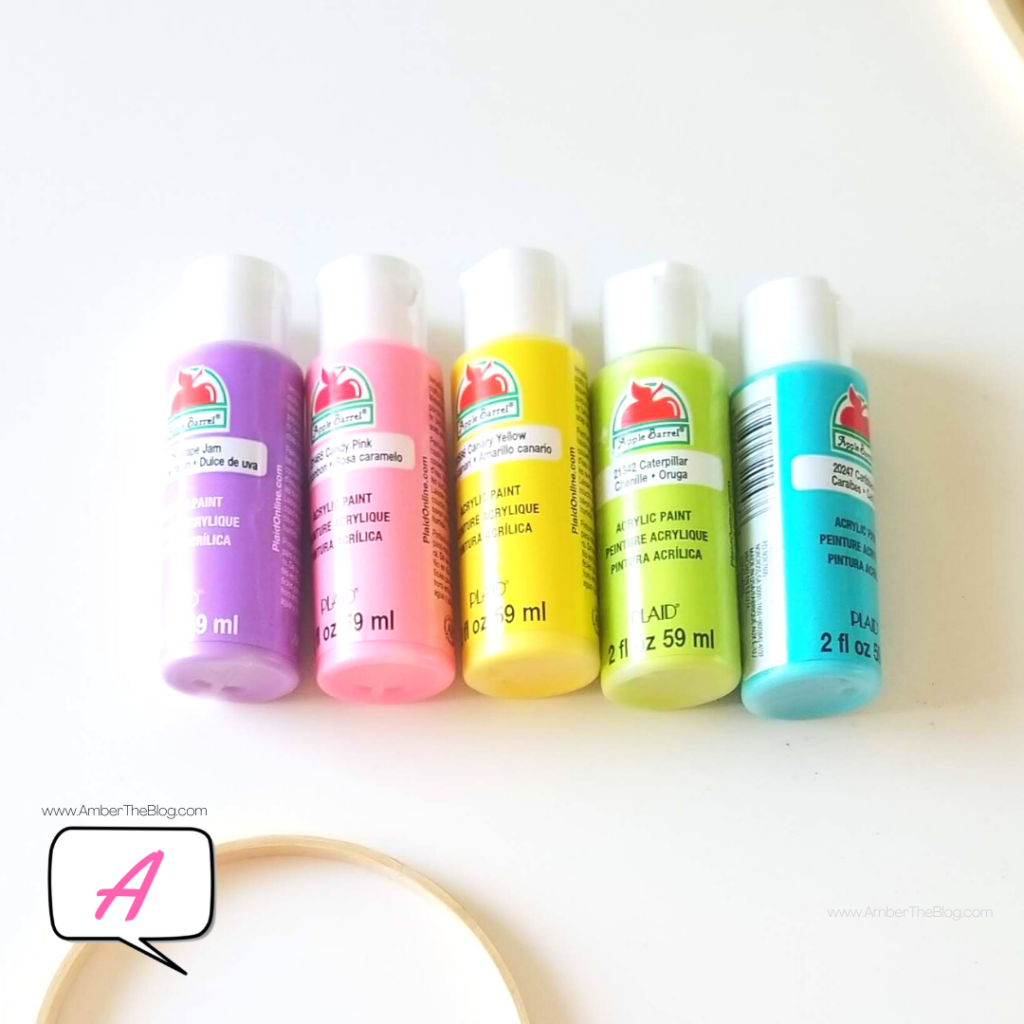
My favorite craft paints!
Before you start painting, I’d suggest drilling a hole in the center for your clock mechanism now. Otherwise, you risk any wood splintering ruining your lovely paint job. This happened a bit to mine, but it was really not noticeable unless you’re very close. I used a cordless drill and a large screw about the size of the hole I wanted. I started with a smaller screw and worked my way up the large one to drill the hole. If you have a drill bit the same size, you can use that, too.
Once you’ve divided up your hour sections and have your center hole, it’s time to paint! You can optionally use washi tape or painter’s tape to block out your areas, or, like every other chaotic thing I do, you can just freehand it like me. I first painted along the edge of my current hue and then filled it in. I actually had one color I just didn’t like, so I painted over it with three layers of my new color. So don’t worry about making a mistake! Almost anything can be fixed! Do a few coats to really cover the wood grain and let it dry thoroughly.
Grab your numbers! (Or Roman numerals if you’re fancy~.)
It’s time to put those babies where they belong! Once they are properly applied, all you have to do is insert your clock mechanism according to the directions. I fiddled with my clock hands a bit (one bent a tad during installation) and made sure that 1) none of them touched each other, and 2) none of them touched the surface of the clock face. Either one of these issues will prevent it from operating properly.
Them simply insert your batter, check its operation, and voila! You’re ready to hang up your brand new wall clock. Congrats!
It’s really as simple as that! Did you make one? Tag me on instagram! If you have any questions, drop a comment below and I’ll do my best to answer you.
There is an entire paragraph of things I could write to improve metrics and make sure this gets out, but unlike those recipes that leave you thinking, Just get to the recipe, already, I’m not going to drag this out.
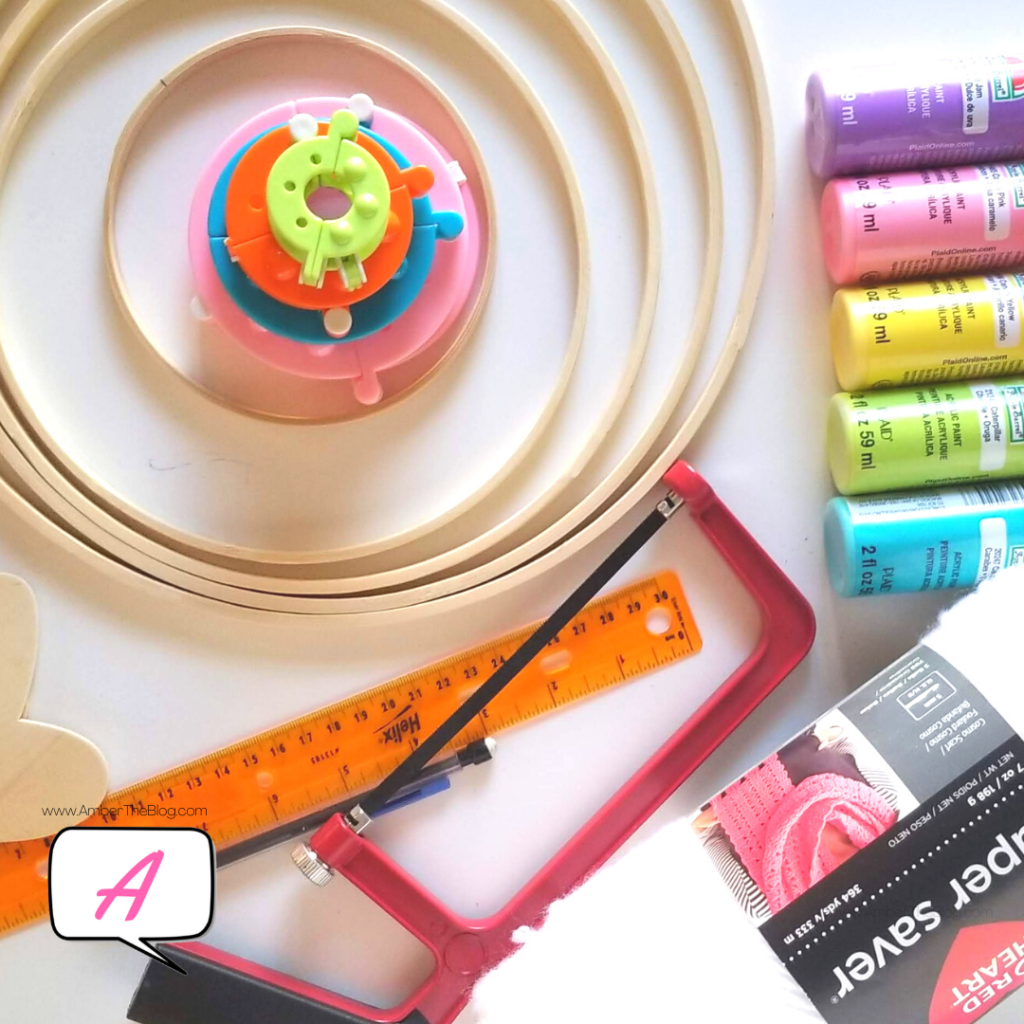
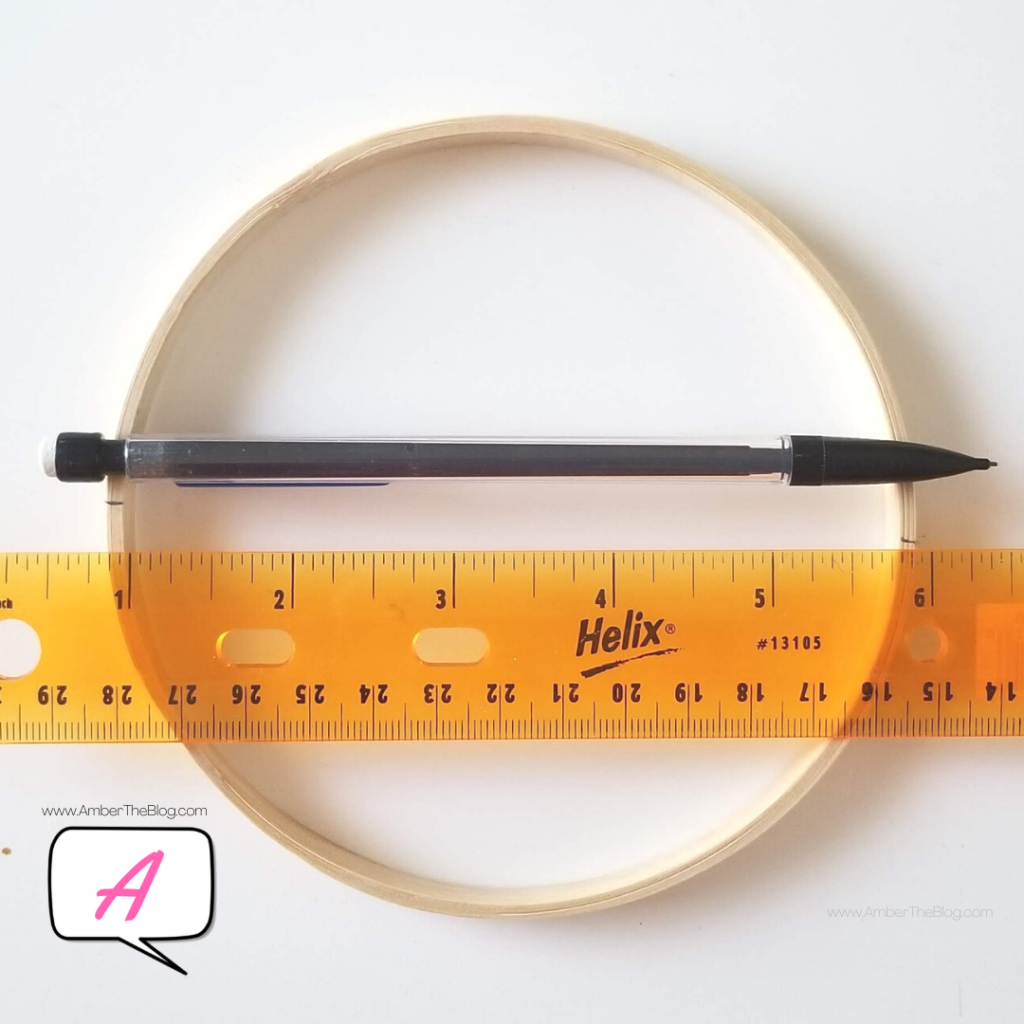
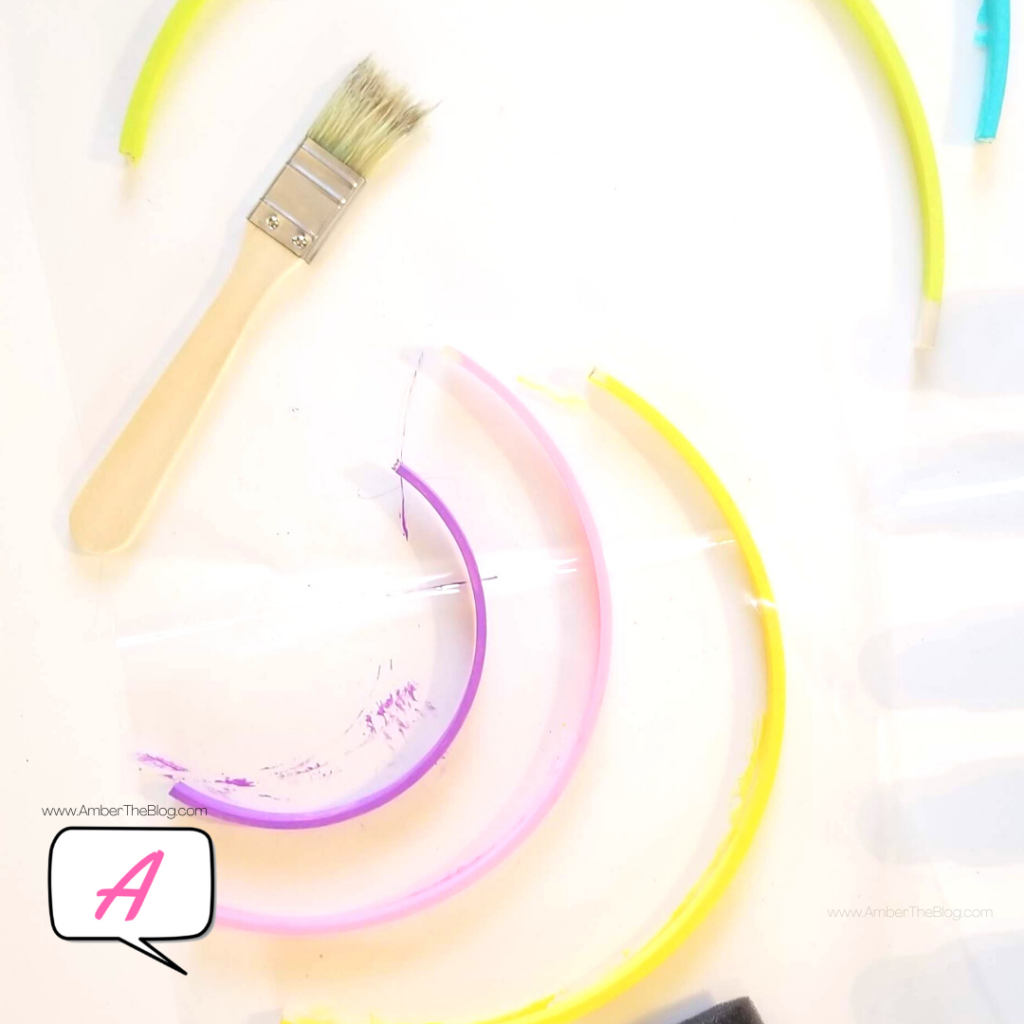
Start by measuring the hoop. When you find the widest point, mark it for cutting. Double check yourself and don’t be crooked like I was the first time when I took this photo.
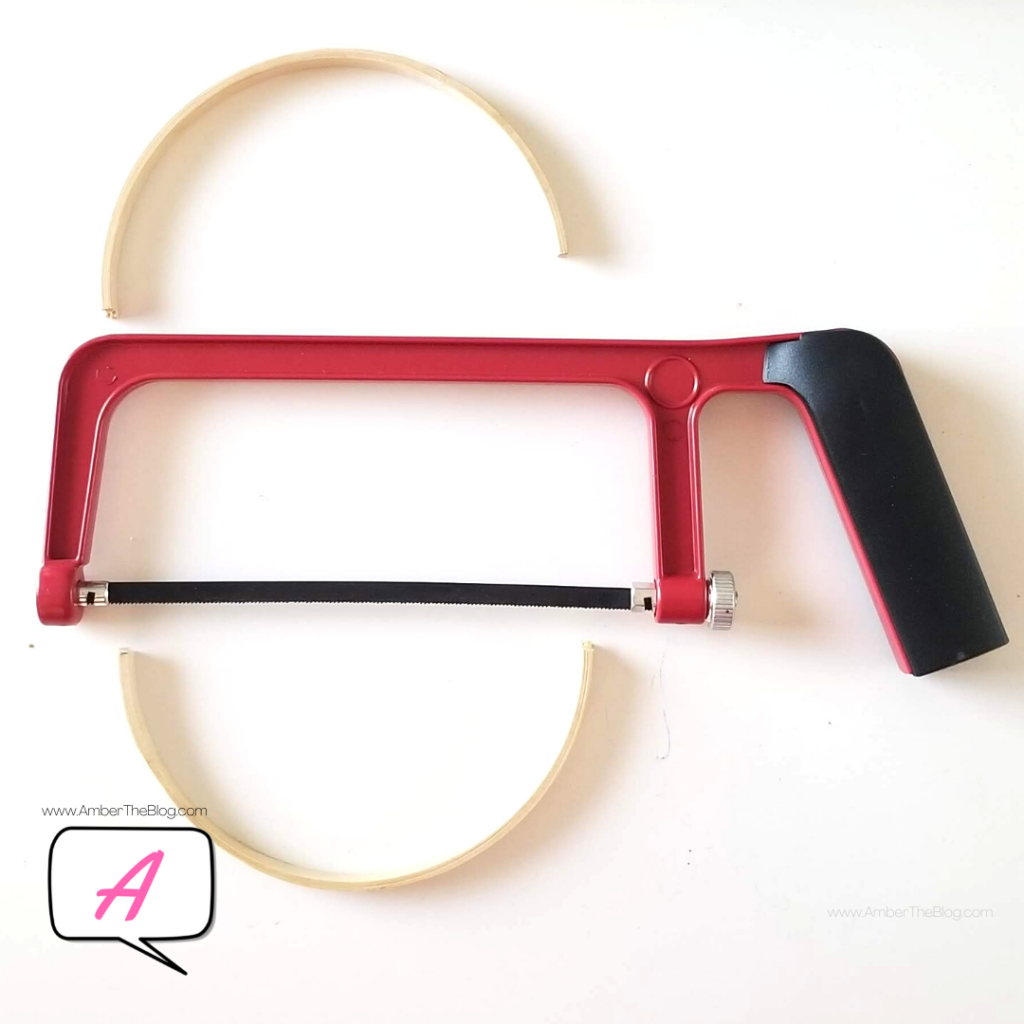
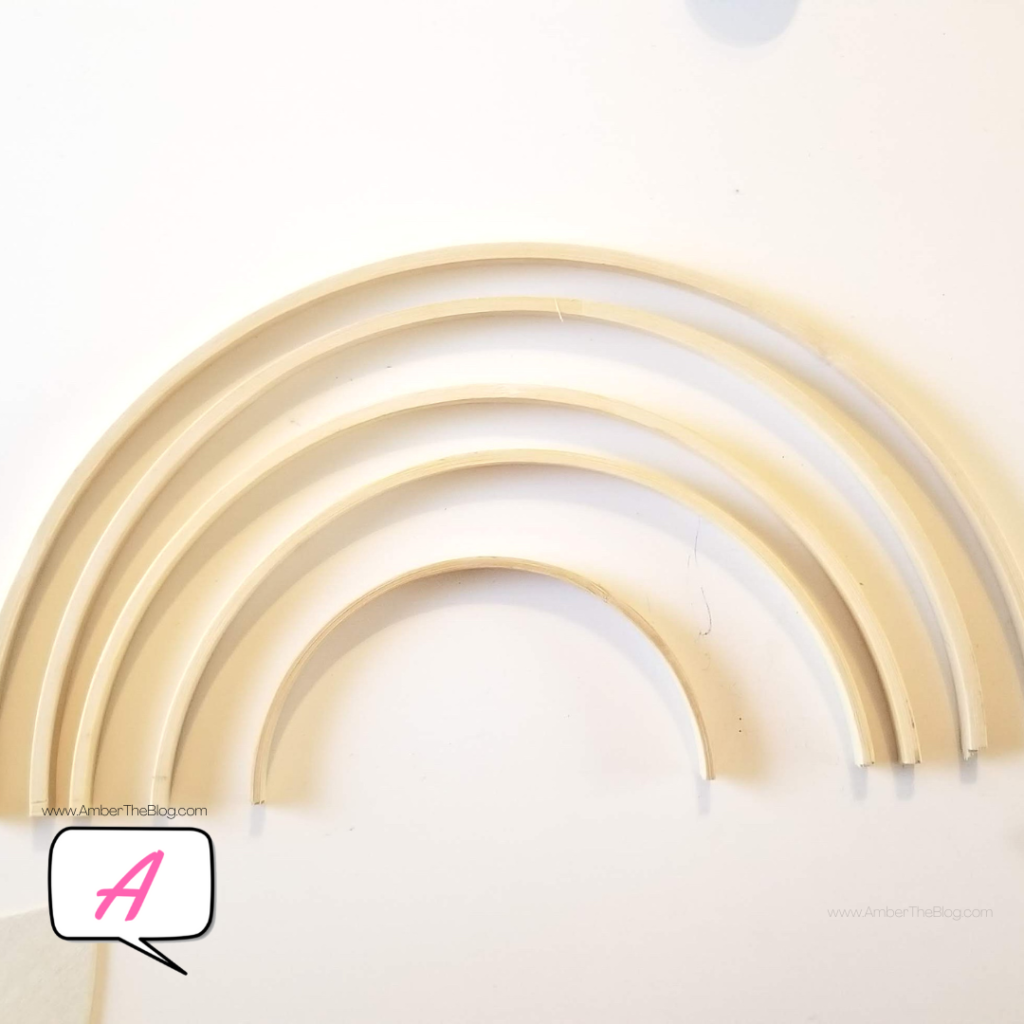
Cut along the lines on all five hoops. Check to ensure that they all align at the base the way you want. Make more cuts as needed.
Bases all aligned where I want them. Yay!
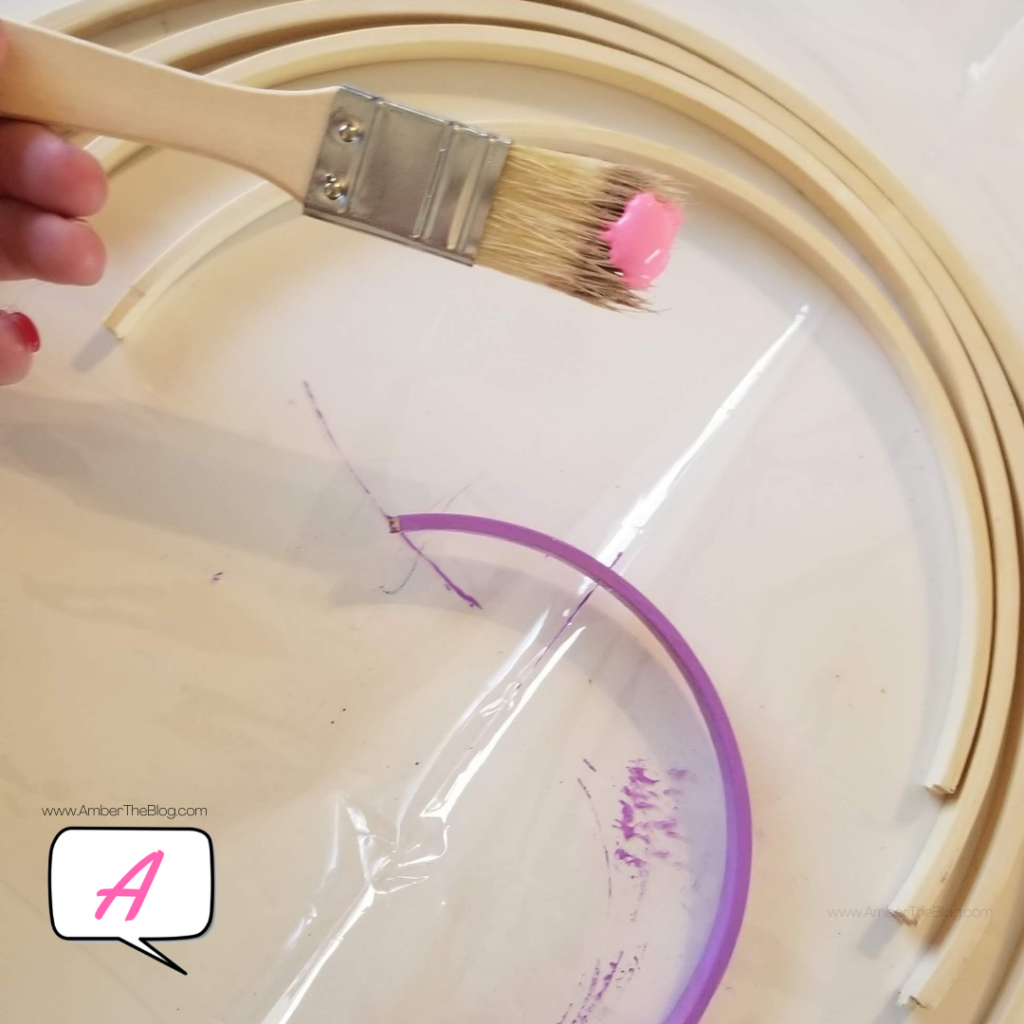
3. Start painting! Give it at least two coats and plenty of time to dry in between.
While the paint is drying, it’s a great time to move onto your next step, which is
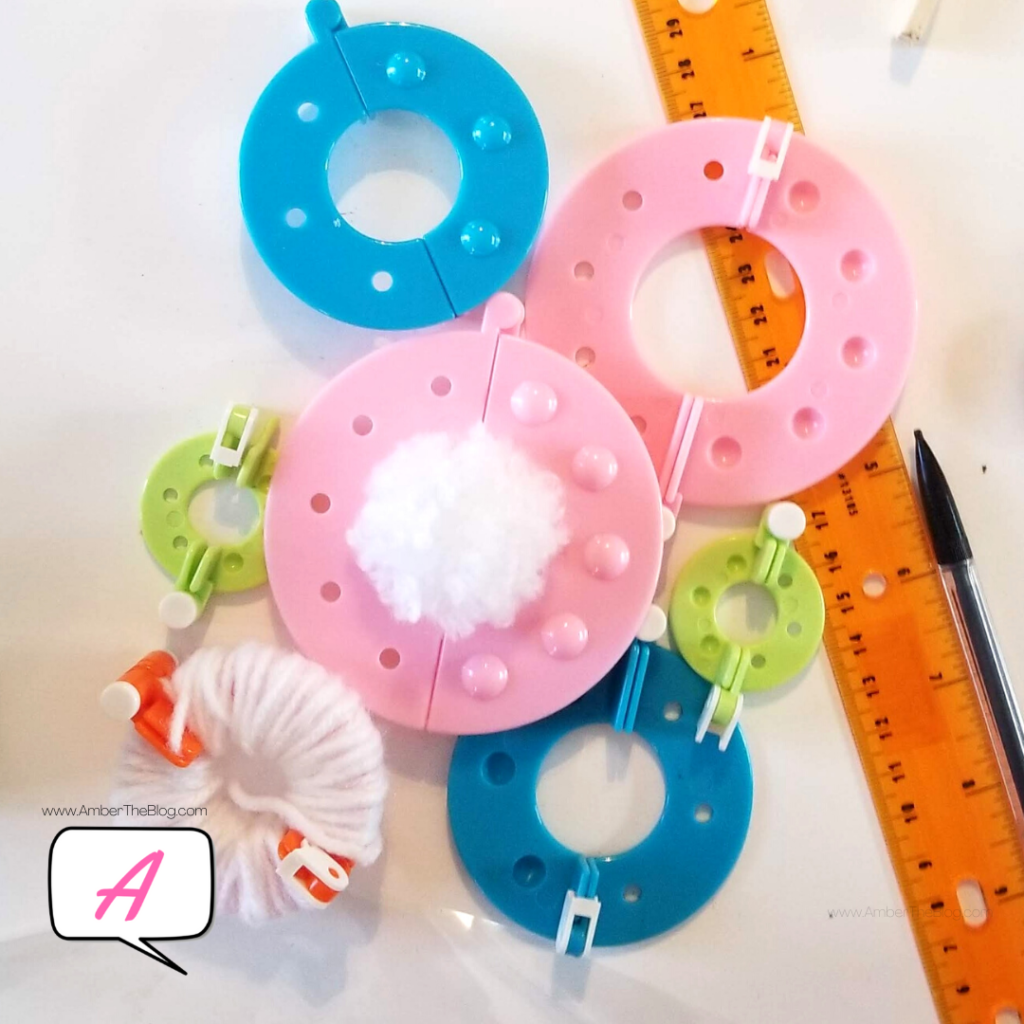
4. Make poms poms!
Make pompoms. Make all the pompoms. Making them in varying sizes gives the clouds a nice puffy effect as opposed to them all being the same size. A good and sharp pair of scissors makes this task go by a lot more quickly!
Once your paint coats are dry and your pom poms are ready, it’s time to heat up the glue gun.
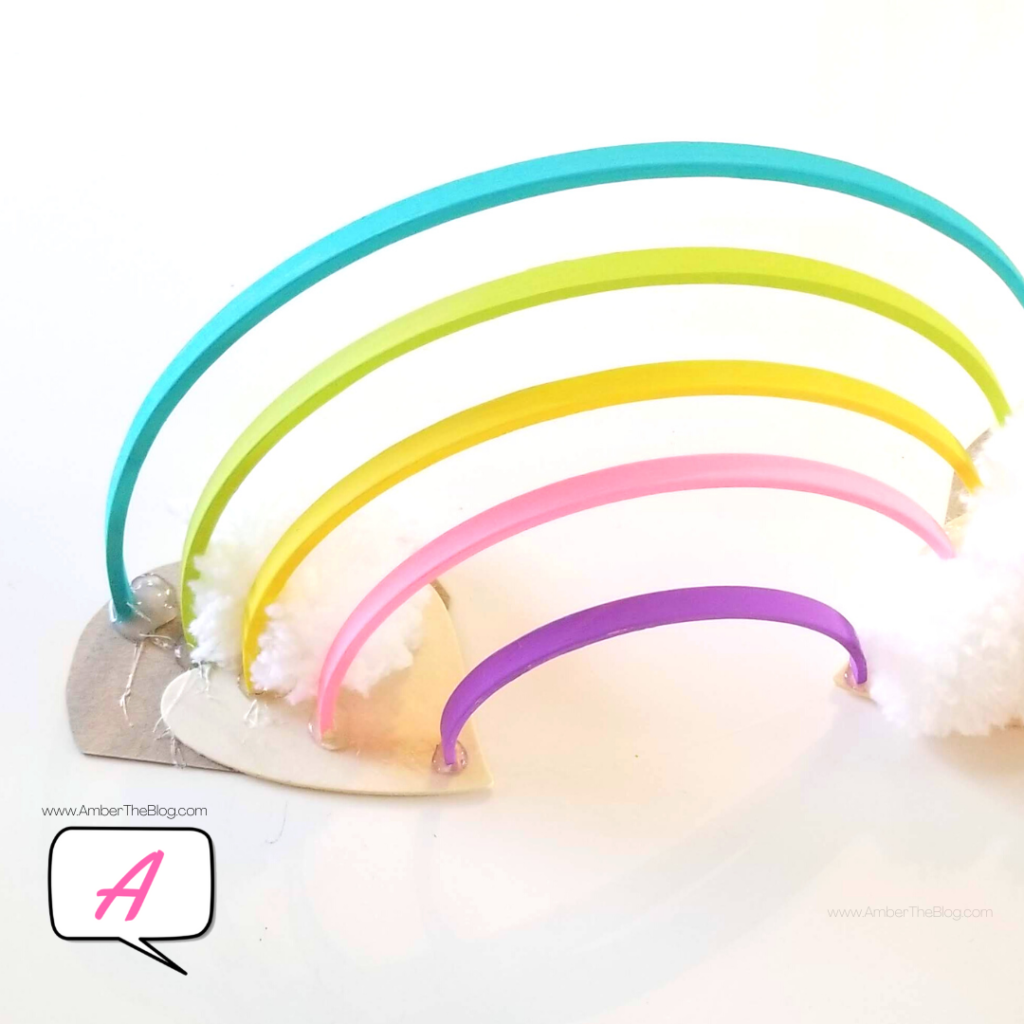
5. Glue the painted arches of your rainbow down, one side at a time. Do one arch completely before the next to ensure you get them straight. (Sometimes hot glue likes to move while it dries, so you may need both hands to hold the arch in place.)
6. Glue the next arch behind the previous, leaving a space of about 1-2 fingers width. (Enough to hold some light mail easily.) Repeat until the rainbow is complete.
I used chipboard to extend the base of my wooden hearts.
7. Once the glue has cooled and your arches as stuck tight, begin placing your pompoms. Go ham. Fluff it up as much as you want!
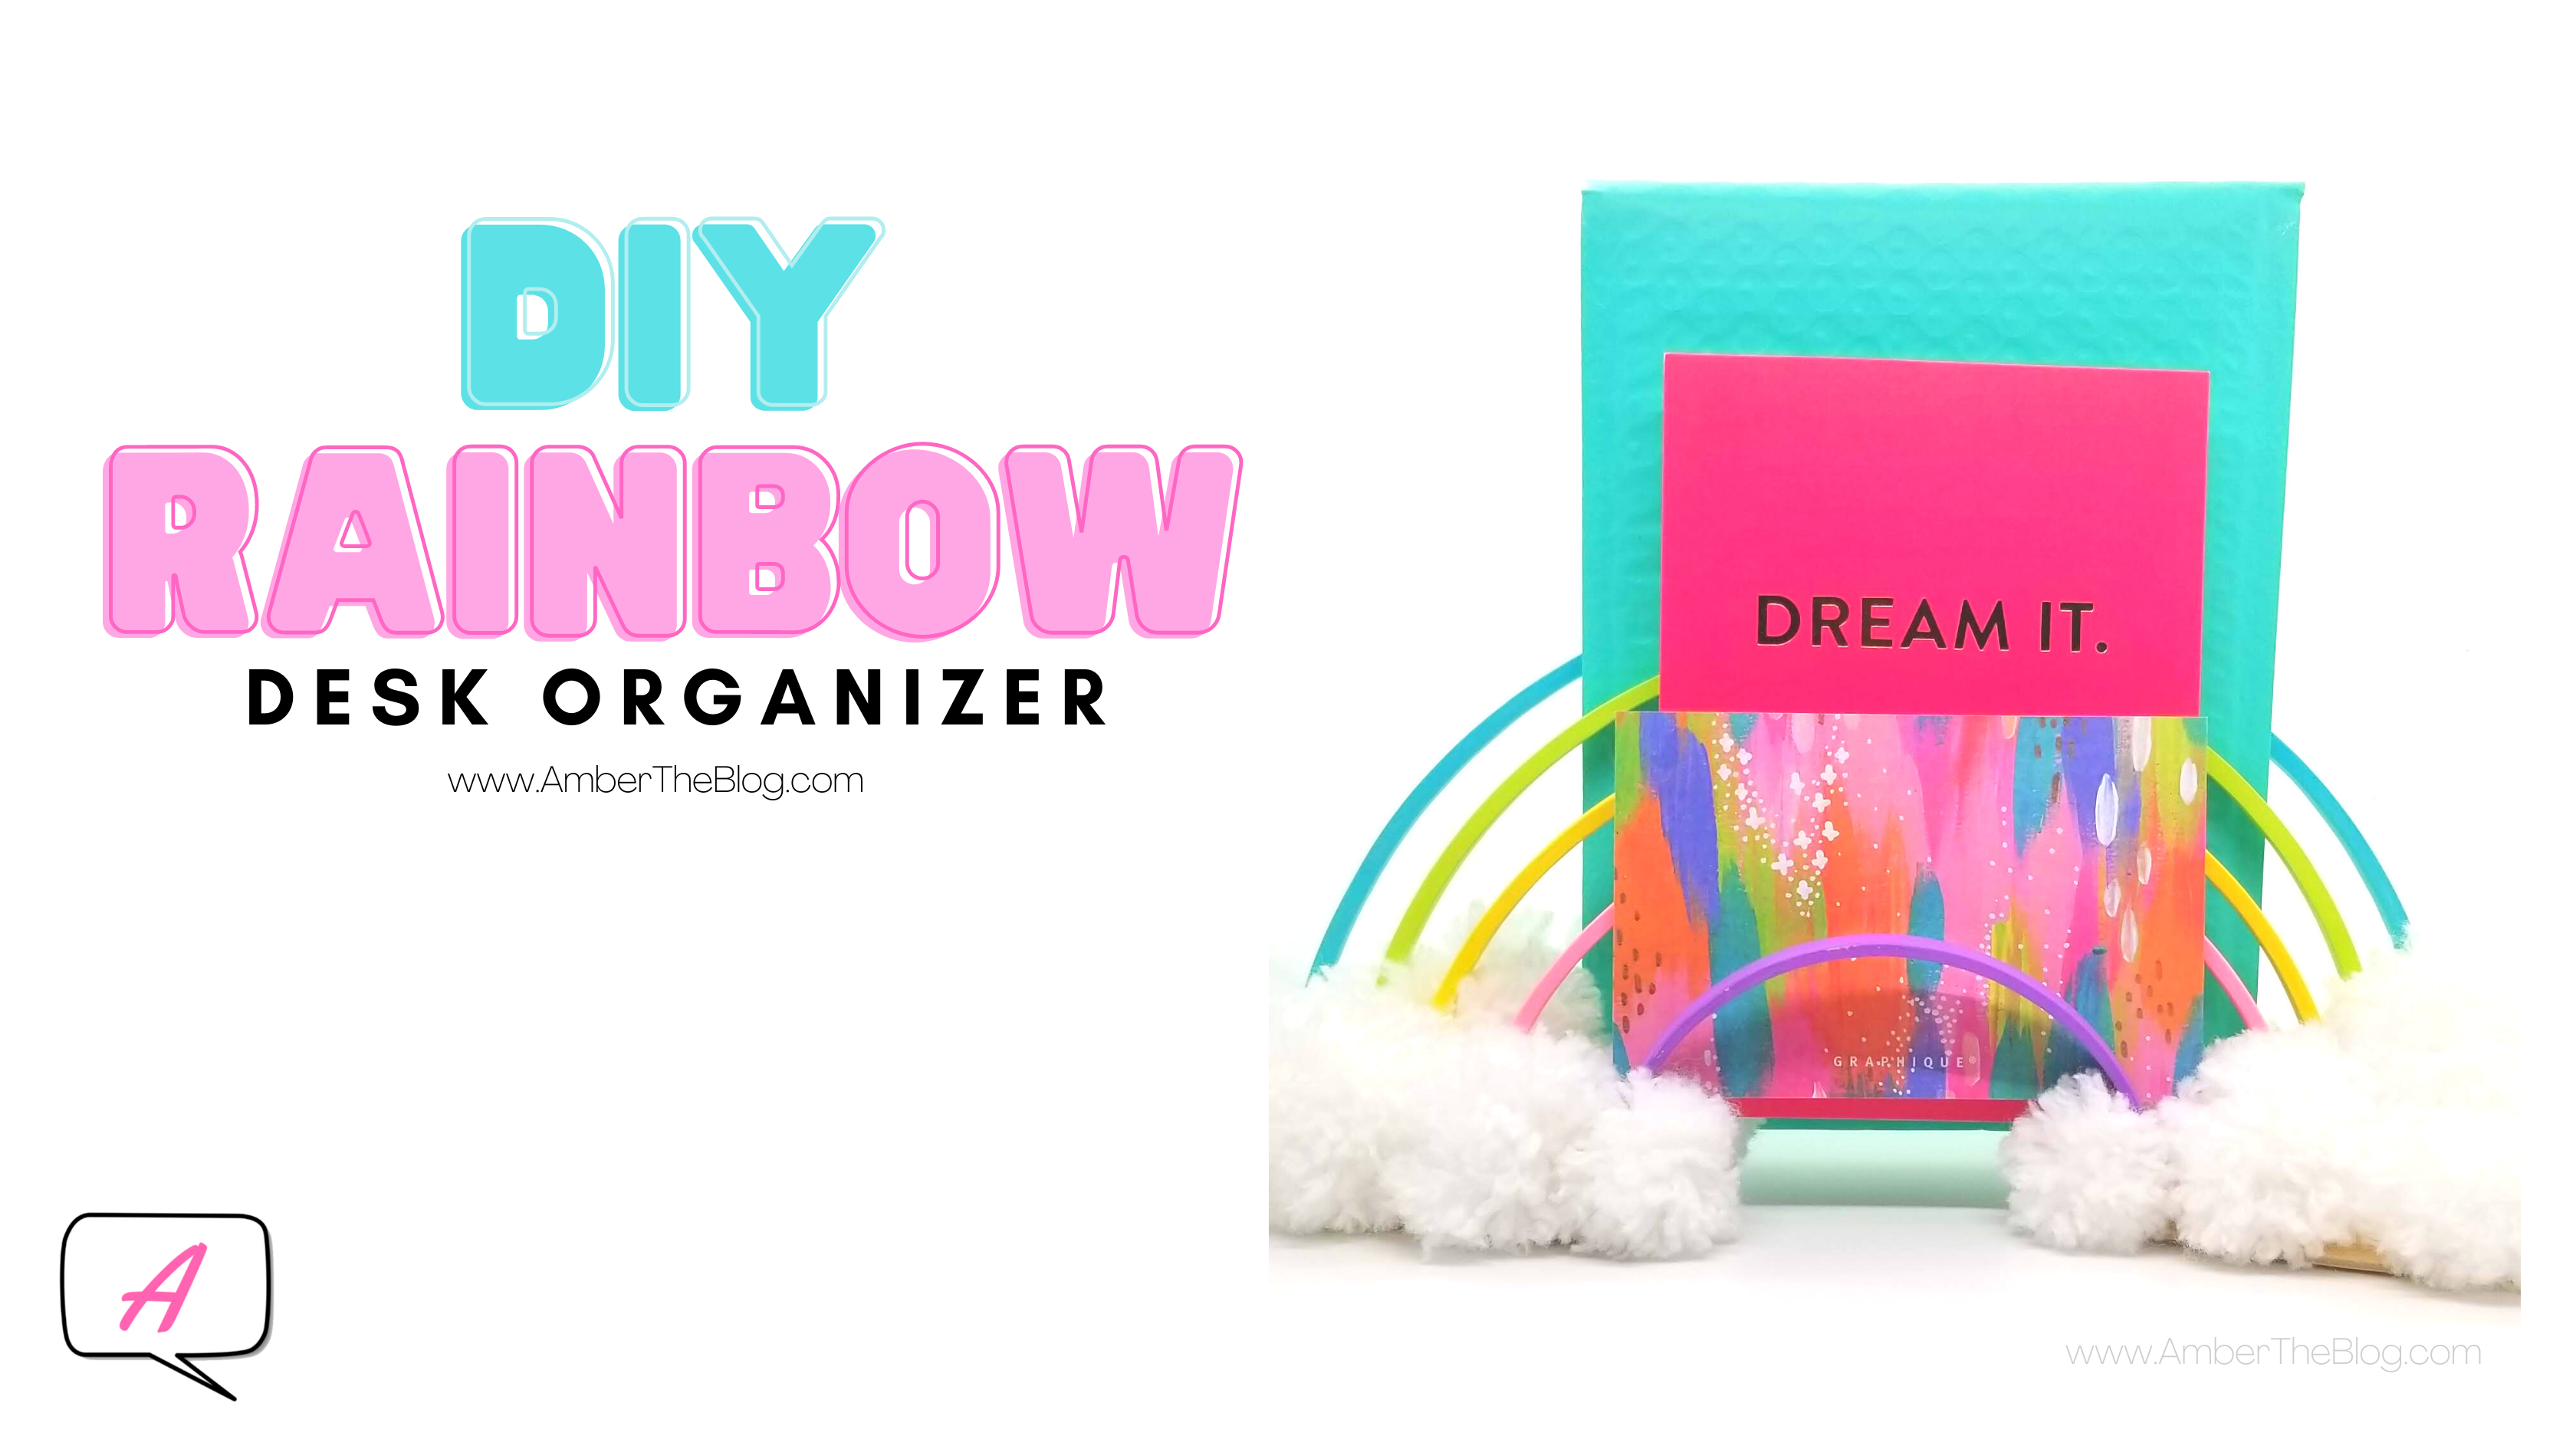
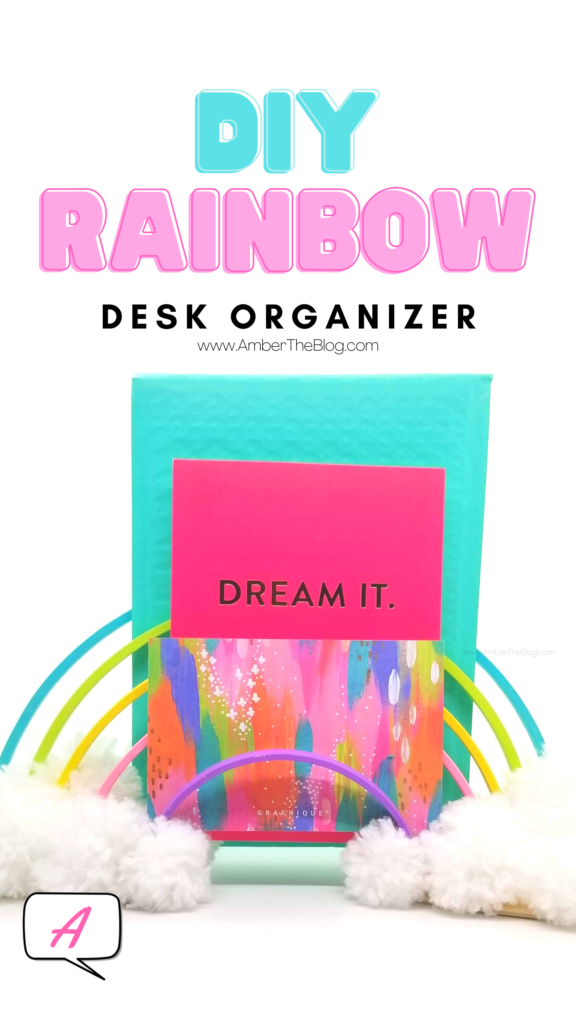
Once everything has cooled, you have yourself a fun, lightweight, and totally brilliant desk organizer (or even just a cute piece of décor)!
This project is super easy and can easily be done in a single day. If you want to speed up the process even more, you can purchase premade pompoms. Special thanks to Amber (wow, great name!) from Damask Love who inspired this project with her Waldorf Rainbow DIY.
Have you tried this type of project before? What other crafty ways can you think of using embroidery hoops for something besides embroidery? I’d love to hear your ideas in the comments below. As always, so glad to have you here. Keep crafting!
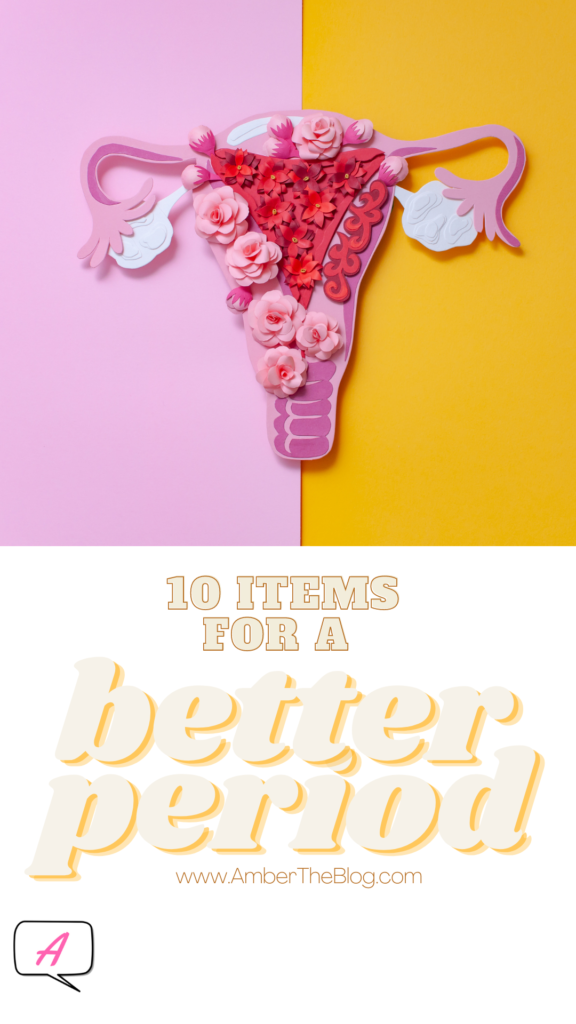
Whew. In my general menstruating experience, periods suck. To be fair, I have extra issuesto deal with than your monthly bloat, moodiness, and general crummy feeling. I have endometriosis and PCOS, both of which take your period from being an unwelcome house guest to being GODZILLA DESTROYING TOKYO.
About a two years ago, I even had surgery to alleviate some of my uterus blues. So when I say I’ve tried it, I mean it.
Thankfully, while many of the “surefire” tricks have been nothing more than gimmicks, some have actually helped. And by that I mean improved my ability to deal with debilitating cramps, bloating, pain, or alleviated a period associated annoyance entirely. So, without further ado, here are my favorite seven items and three bonus items to help manage your period.
This post will have links to outside sources, such as Amazon. These links do not affect your prices.
If you don’t have any of these, you may want to try them! I can’t offer medical advice, but I can tell you that they help me great. My period panties are serious all-stars. Nothing like the comfort of wearing underwear while staying protected, or combining them with other protection methods to ensure zero leakage on heavy days. It gives me peace of mind to sleep soundly.
My trigger massage gun I use multiple times a week, EVERY week. My husband uses it, too. Anytime anyone at my house complains of a sore neck or back, I whip this baby out and impress them. It really feels great and works to relieve tension. (It’s also great for post exercise release.)
My TENS unit is a champ. I’m really surprised how long those batteries last AND how effective it is. It’s really powerful for an at home TENS. Seriously, don’t put it too high or you’ll give yourself the twitches of the century. A BONUS item I’ve come to love is a belt attachment. The one I have isn’t being made anymore, but this is almost the exact same thing. It makes it so much easier to apply to when you’re by yourself!
And the washable heating pad? That thing has been going strong for TEN. YEARS. Granted, it’s just now starting to get a liiiiiiittle too hot with it’s age. Poor thing is losing it’s mind. (As in, suddenly painful heat.) But it’s has been used and abused for ten years. It needs to retire.
And I will replace it with the exact same thing.
There you have it! My favorite items that I use on the reg to improve my period. What works for you? Tell me in the comments!
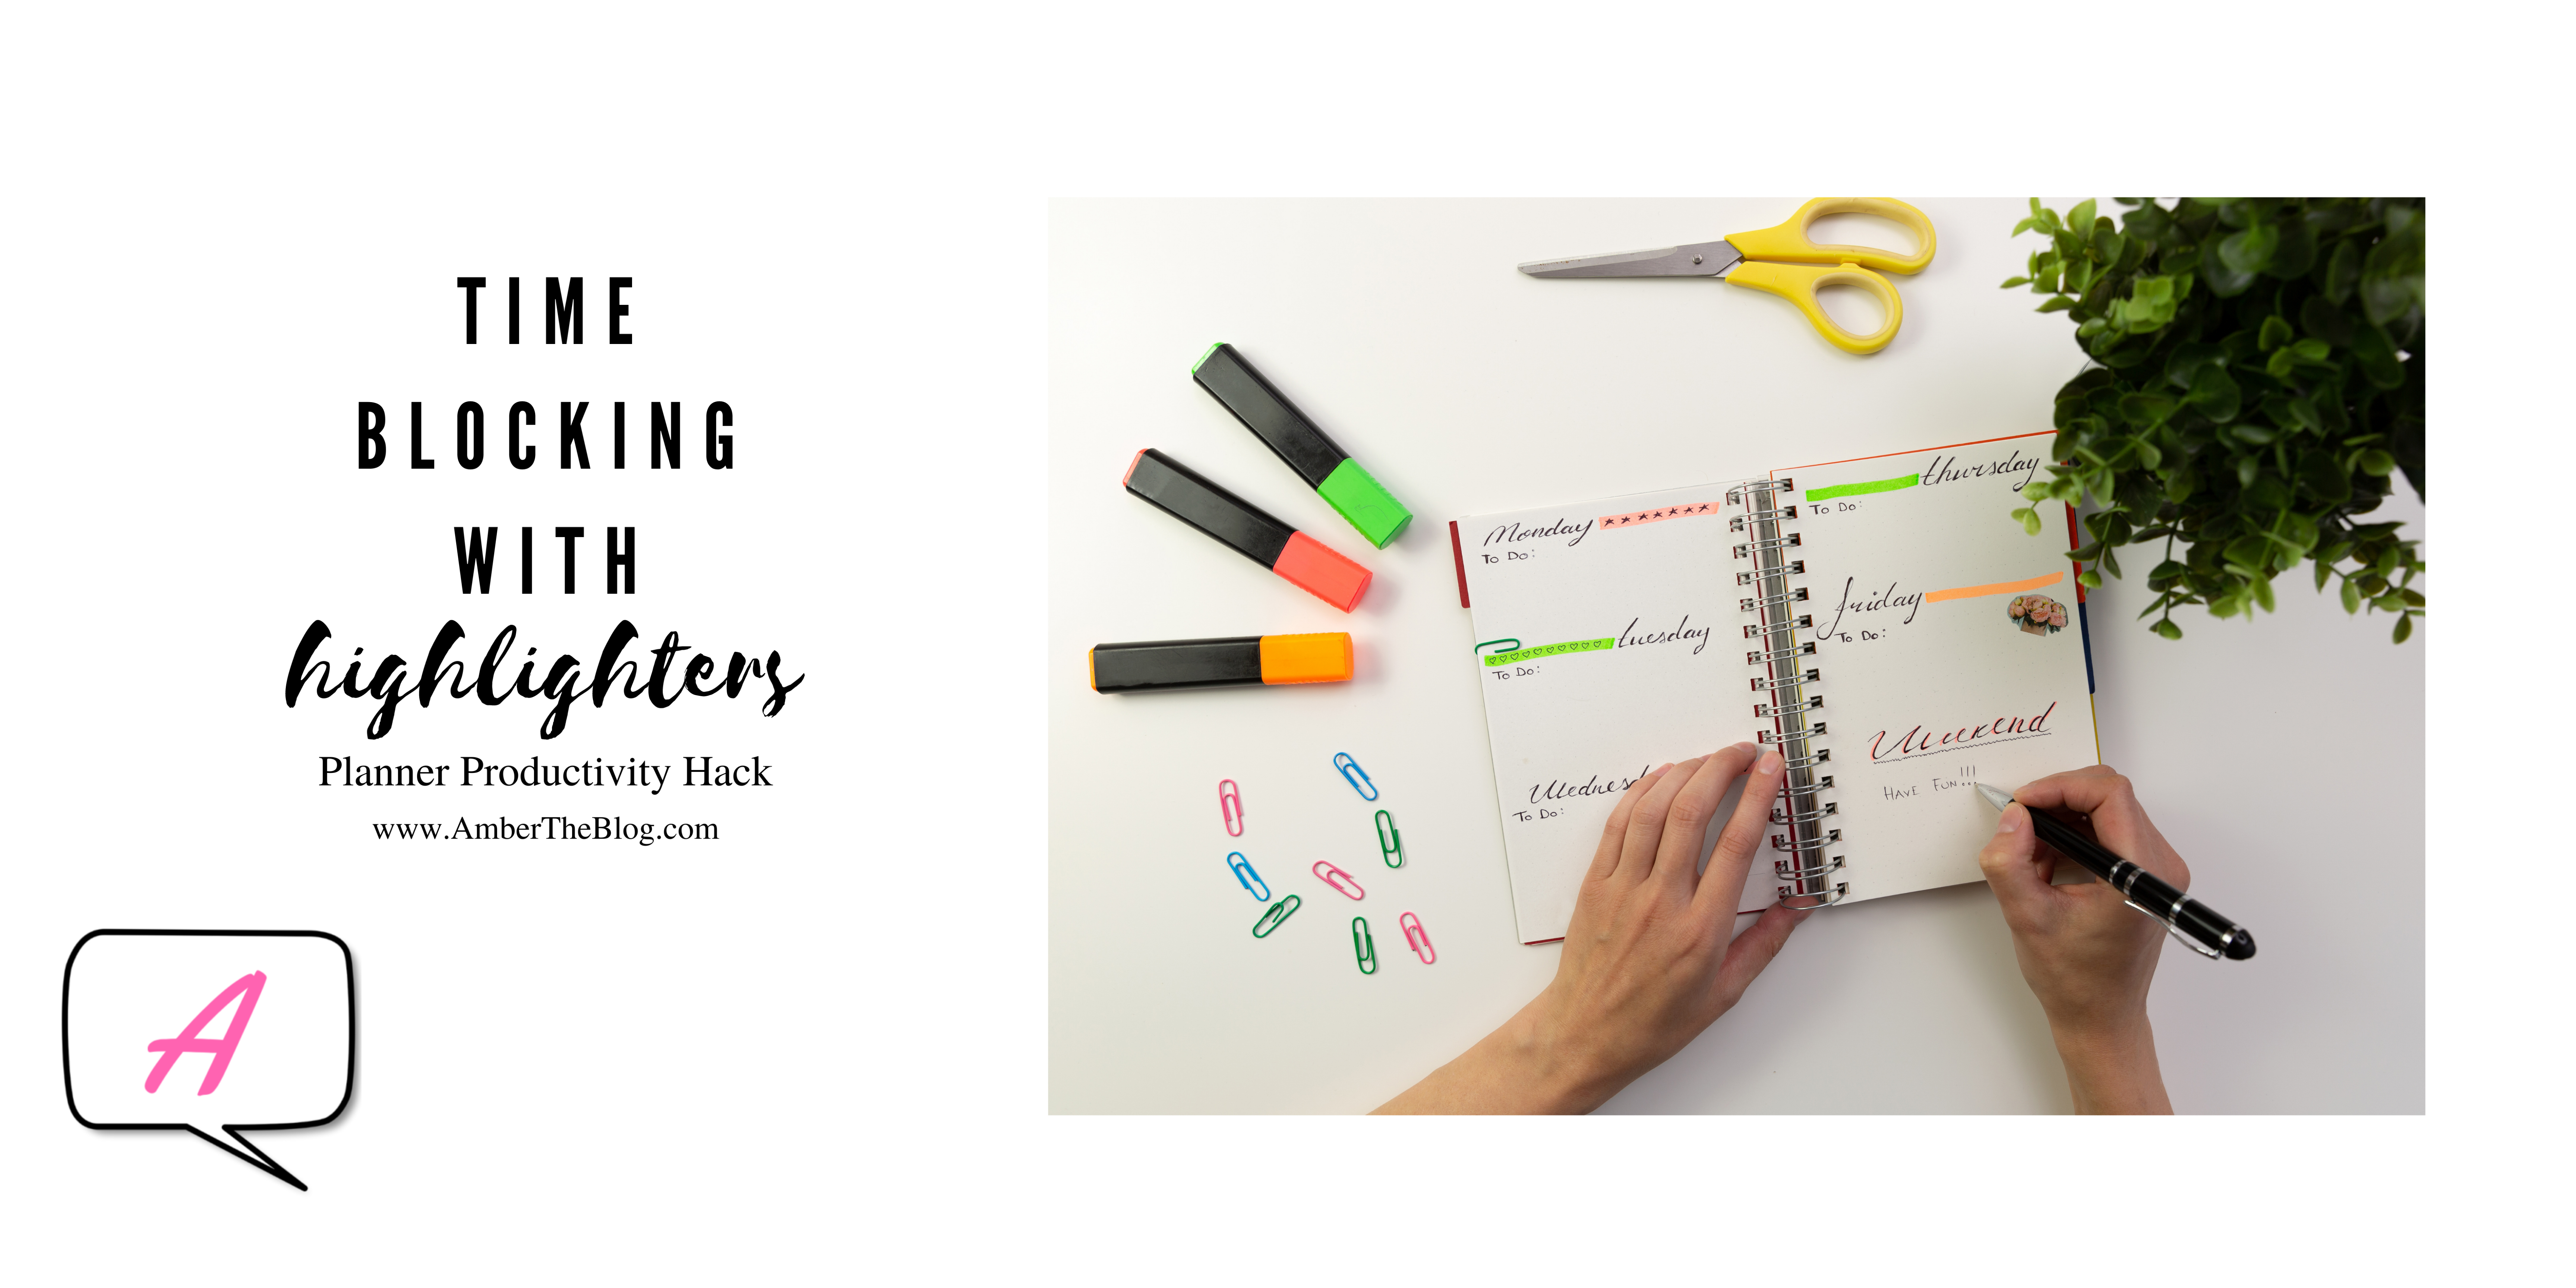
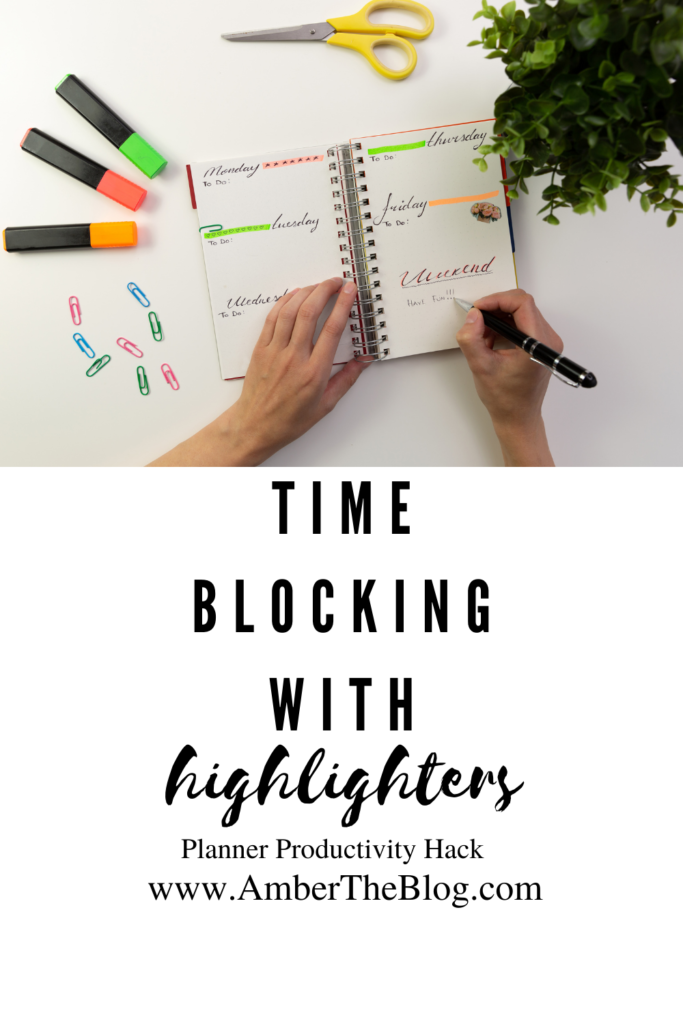
Now raise your hand if you love the idea of using a planner but is seems super complicated and every time you try, it is great for like a month and then you just drop off the planner train, landing on your caboose.
Does that sound familiar? Me and my ADHD definitely have walked that path before. Overall, planning has really helped me when anxiety or ADHD see a task and MAGNIFY it to impossible proportions. And being able to look at my tasks at a glance and know what is expected of me helps both my anxiety and my ADHD a great deal. I can worry a lot less about forgetting things. I can lessen the overwhelm by seeing tasks I don’t want to do (like dishes) next to things I enjoy (like crafts) and see that the dishes will take me half the time as my embroidery for the day. (YAY!)
A friend introduced me to this concept about eight years ago, and ever since then, it has remained the one planner hack that I go back to every single time. In my planner, this is a non-negotiable!
This hack saved my anxiety and ADHD, plus helped me save so many hours a week!
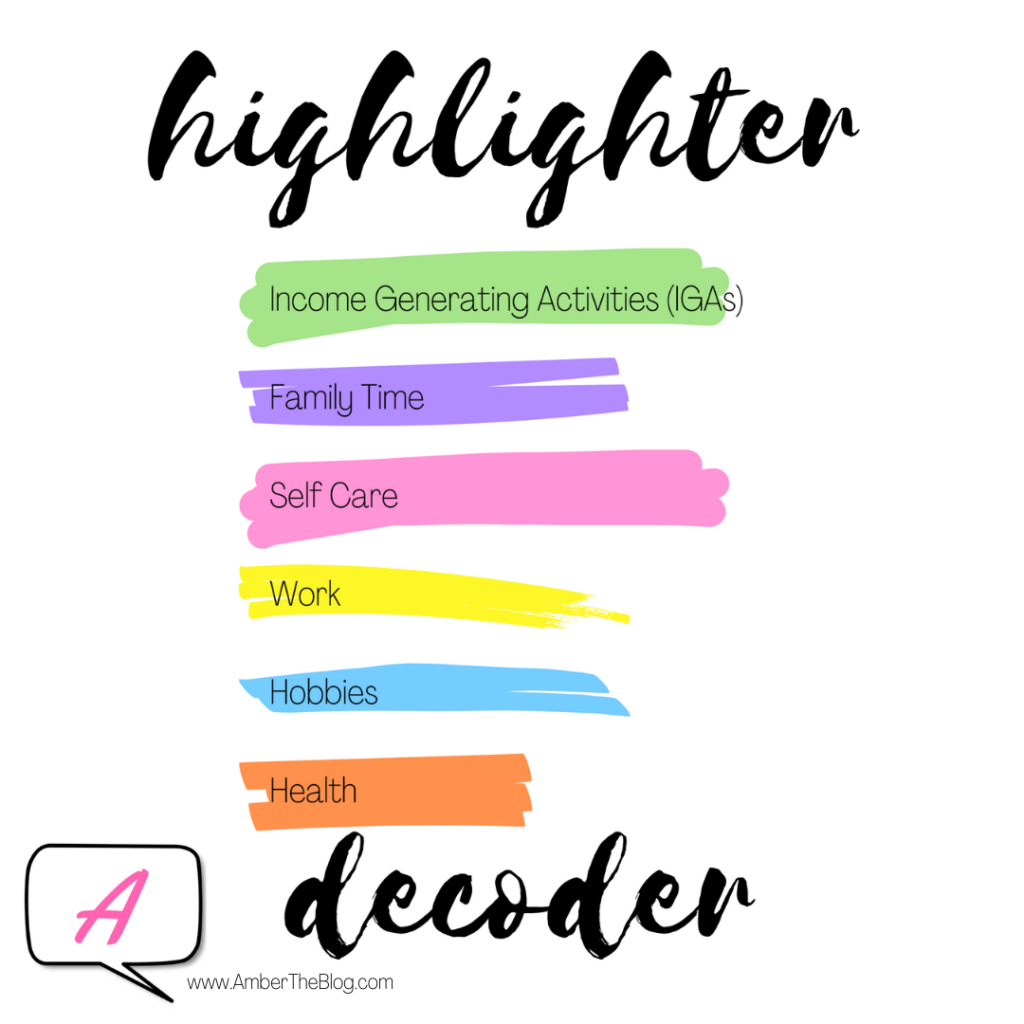
First, you need to decide what categories you are going to put your activities under. It can be as many as you want. I tend to find five are what most people use. If you want to borrow my categories, you can save the image below, print it out, write it on a sticky note, or copy and paste it into your digital planner.
Income Generating Activities (IGAs) are any activity I do that contribute to my business. This could be designing a pin, scheduling posts, or designing something for my shop. You would have to decide how you want to use this if you don’t have a side hustle.
Family time – this is time spent with the family! This could be everyone at the dinner table without devices or playing a game together. (May I suggest the latest Mario Party?) It is really important to add this onto your planner. Even if it moves around and you have to retro-actively highlight something in the past, I recommend it. That way, at a glance, you see what your weekly balance is like. Because this color tends to have the least amount of space in my planner, I also include things like doing my Bible reading or going to Bible study in this. I consider my church friends family, so this fits for me!
Self-care – these are things that are good for you, but aren’t necessary to simply being a live. (At least, that’s how I code it.) Things like doing my nails, getting a haircut, etc. If it’s necessary to me not dyeing, I color it orange.
Work – if you have a job or volunteer on the reg, you can consider using this to mark out hours. Don’t forget to include drive time as included hours when you’re highlighting!
Hobbies – yay! This one is pretty self-explanatory. But basically, if you look forward to doing it, it’s fun, and not necessary, it should go here. If you simply LOVE working in your garden, or even going to the gym, it should go here.
Health – I mark everything from cooking, eating, exercise, to medical appointments here. I even include my shower time!
So how does this help you save time or manage anxiety or ADHD?
Well, firstly, I can’t claim it will do any of those things for you. I can, however, attest that it has made a big difference for me and my individual needs. I tend to get anxious when I worry about having enough time to get things done, worrying that I forgot something important, or in general getting discouraged when I look at a generic To-Do list that seems big enough to bury me alive. And it turns out that worrying and redoing a task five times (ADHD yaaay) wastes a LOT OF TIME. If your needs and challenges are similar to mine, give it a try! I’ve heard from a lot of people even without my particular challenges that this method helped them a great deal.
How to Plan
With the color coding system, I like to add a week at a time on a weekly spread. For things like doctors appointments or set dates, I use the monthly spread, and then just add the appointments to my week when I get there. Things changes so often, so I don’t like to write things down in my weekly spread until I’m about to start that week.
WHICH BRINGS ME TO SOMETHING VERY IMPORTANT. Use pencil, erasable gel pens (there are also super cute ones, too), or go entirely digital, like I’ve recently done. Pen is a NO-NO! If there’s one thing that irritates me to the point of not being able to concentrate, it’s an illegible planner. You might also want some white out tape, which I prefer, because you don’t have to wait for it to dry! Simply drag it over your mistake and get back to working. Nice!
Once you have your basics penciled in, start with highlighting! Then once you have everything colored, you can now see at a glance if you have an imbalance. Did you not schedule enough family time this week? Is it something you can adjust, or is it something to amend next week? Too many green slots and not enough orange? You can fix that, too!
And that’s it! This little trick has saved me so much time and greatly lessened my mental load.
Have you tried this? Or maybe something similar? What works for you? Let me know in the comments!