Posted on Leave a comment

Easy DIY Facemask with Filter Pocket

Hey, all! So with the craziness of COVID-19, medical personnel are incredibly lacking in surgical masks, partly due to factory closures in China and partly due to increase demand by the public and hoarding. To make up for the lack of supplies, there have been multiple requests for capable members of the community to make masks.

Well, TO ARMS, CRAFTERS! If we cosplayers, crafty people, and sewists gather our resources, dig through our tremendous caches of supplies, and supports our communities! If you don’t have these supplies, or there is just a thing or two you’re missing, I’ve got a handy dandy list for you. (And, by the by, I definitely suggest utilizing Amazon or other online service. Most stores are out of elastic because of the many facemask projects. And, of course, if you don’t have to go out, stay home.)

This post may contain affiliate links. For more on that, check here.

Materials:

Tools:

  • Sewing machine
  • Iron (I’ve never used an expensive iron in my life until THIS ONE and WOW. I love ironing now!)
  • Ironing board
  • Ruler or measuring tape
  • Sewing sheers
  • Safety pin
  • Wire cutters (optional)
  • Needlenose pliers (optional)

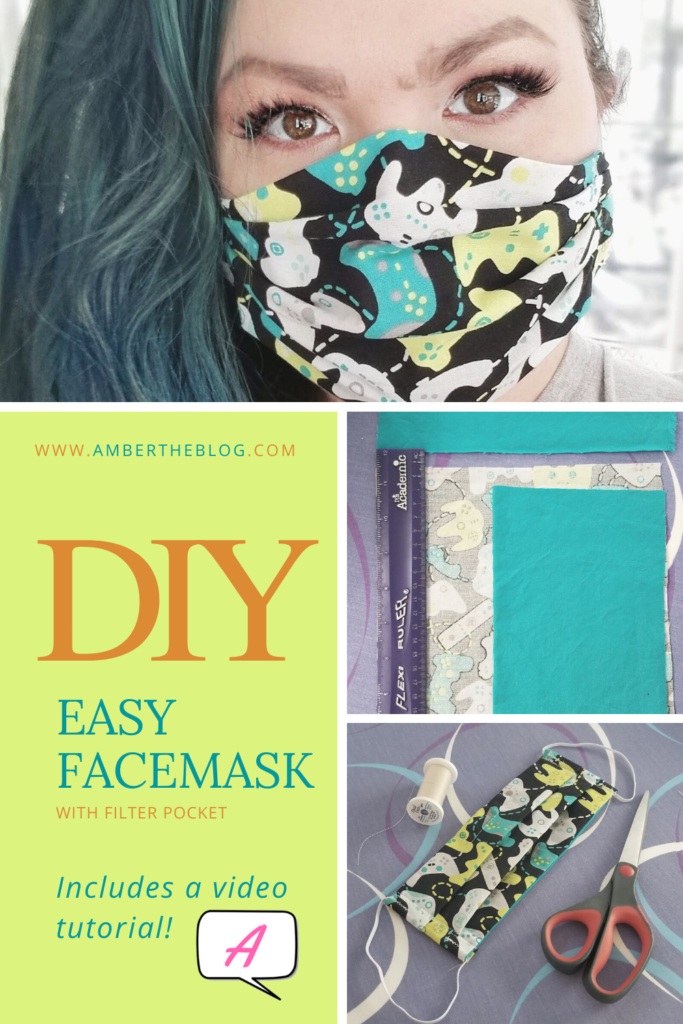
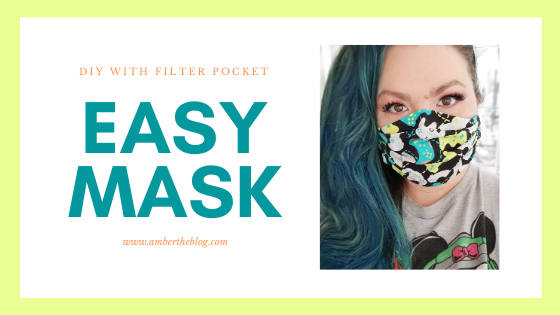
You need one (1) piece of your main fabric that is 11″ x 8″. You will need to cut two (2) pieces of your lining or inner fabric that are 8″ x 5″. Putting this together is really easy, and is a GREAT beginner sewing project. (You can even use this as a home economics lesson during quarantine lock down!) You need to be able to do is measure, cut and sew a straight line, use an iron, and fold pleats similar to folding a paper fan.

Video Instructions: (psst, watch till the end! <3 )

It’s really as easy as that!

You can also add an optional channel in the top of the mask if you want to add some wire to better conform it to your nose. (However, I’ve found that it’s not necessary for a good fit.) You will add the channel prior to sewing the pleats, and after sewing the three pieces of fabric together. At the top of the mask, sew a rectangle with one short side open to allow you to slid the piece of wire into. The wire should be about 1 1/4″ long. With your needlenose pliers, round the ends to prevent them from poking through the fabric. Slide the wire into the channel, then simply sew it closed before moving onto the pleats.

After you’ve sewn up your mask, you can cut a portion of a vacuum filter bag to aid in filtering out particles. (A study was done and found that vacuum bags are nearly as effective as surgical masks.) But because the internet is a weird place, I’m letting you know that I am not a doctor, a scientist, or in any profession to make a professional recommendation about the ability of these things to protect you or others and I encourage to use common sense and ask a professional and also don’t sue me if you get sick kthxbai.

And now you are ready to make your own mask!

Please share to help others!

Posted on 2 Comments

The AMAZING Skin Solution that takes LESS than Five Minutes

You may have seen my recent video on my instagram, but just in case, I’ll make sure I share it below. In the video, I do a (sped up) version of my nightly routine. While I recorded it, including extra time spent showing off the products, it was actually UNDER five minutes, and that included removing my makeup! WOW! I was absolutely amazed.

This post may contain affiliate links. For more on that, check here.

Products Used:

  1. Facial Cleanser by Instanatural – use the cleanser as directed. If you need a little extra makeup removing power, add a little extra virgin olive oil in with your cleanser. (TRUST me!!!) Wash away!
  2. Toner – Vitamin C by Instanatural – depending on the toner, the directions may differ, but generally, you want to shake the product, dispense into either your palms or on a cotton round, and pat it gently onto the face. Toner is so important to your facial routine. But it won’t give you the benefits if you don’t have the right product (avoid alcohol at all costs!) and don’t use it at the right step. Toner is done after cleansing to adjust the PH balance of skin back to where it should be. This allows the products you’re about to put on your face to actually do the work they are supposed to. If your toner makes your skin feel “tight,” most likely, it is just a drying agent and not a balancing one, and that is a HUGE NO NO!
  3. Serum – Vitamin C by Instanatural – the serum is the powerhouse of your nightly routine. It is the agent that delivers the compact, concentrated nutrients that help your skin. I love the vitamin C serum because how it helped reduce my redness and in general, evens my skin tone! You might want a different serum depending on your skin goals and needs, but if you’re new to skincare, you can’t go wrong with this one! (And the smell is simply YUMMY!)
  4. Roller by Witty – I love using my roller! Not only does it just feel awesome, but it also helps me save money! Seriously. I can get away with just a few DROPS of my serum when I use my roller because none of it gets soaked into my fingertips! (To be fair, in the video, I use more because instagram.) It is also great for helping with cystic acne. Pop that baby in the fridge and apply it to any inflamed areas to reduce swelling. It also works great for reducing morning puffiness.
  5. Night cream by Instanatural – after you’ve applied your serums, the cream is going to be the protective layer that keeps your skin hydrated and helps you to absorb the nutrients from the serums while you sleep. I had the pleasure of being taught how to give yourself a spa facial by a premier aesthetician, and it makes such a difference. I’ll be able to do a video on that later, but for now, when you apply lotion, only dispense it on your fingertips. Your fingertips absorb product the least, which means it will last longer and most of it will go on your face where it belongs. Tap your fingers together until you have an even amount on each fingertip (sans thumbs). Then, gently tap the product all over your face until it is evenly absorbed. It helps to stimulate circulation as well as prevents aging by eliminating unnecessary tugging. Plus, it just feels nice!

I’ve been using Instanatural since 2017 when a friend introduced it to me (Thanks, Savannah!). It’s made in Orlando, and I admit, this FL girl loves that! (Plus, I feel like it’s genuine Florida citrus in these products!) The products are clean, not tested on animals, and actually work.

No filter, no editing, just my face, half brows and all!

If you’re wondering if these will work for your skin, I’ll share what skin hurdles I have and how these have helped. First, my skin is combination. I have patches that are usually oily and patches that are sometimes dry. I also have random breakout (usually coinciding with my cycle) and have hyper-pigmentation, where the skin is perpetually red after a breakout in the past. Even though I have rarely broken out since high school, my skin retains the redness of each one for months, sometimes years! I also have sensitive skin that gets easily irritated and inflamed. I have the best experience with my skin when I regularly do this nightly routine. During the day, I also use Instanatural day cream and sunscreen if it is in the summertime. I exfoliate as needed, which is usually every 1 – 2 weeks. Also, I have found that drinking lots of water makes a big difference, too!

So tell me – what works for your skin? What products do you love? Try this easy nightly routine; I’d love to hear your results!